EXPERT KNOWLEDGE FIRST
Cultivate your data.
Receive the latest updates, guides, office hours, videos, and content for AROYA
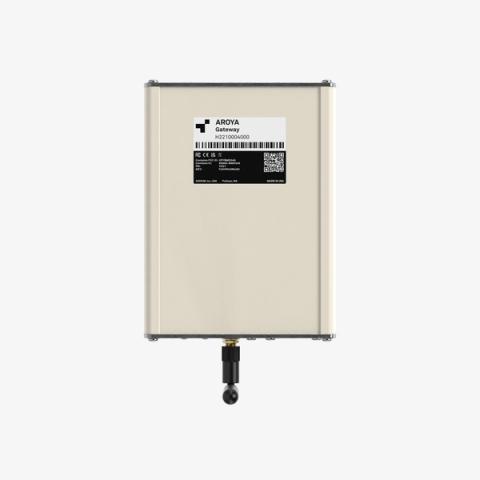
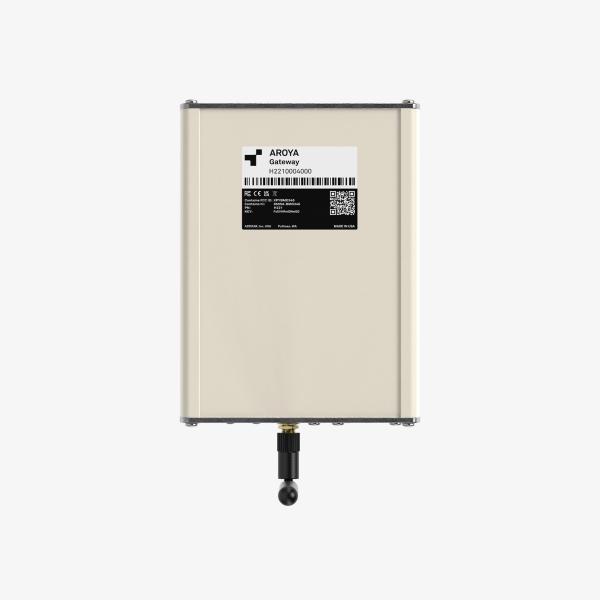
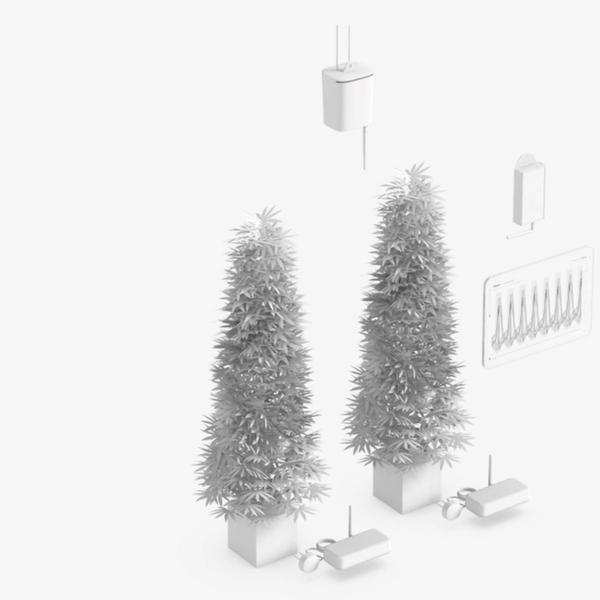
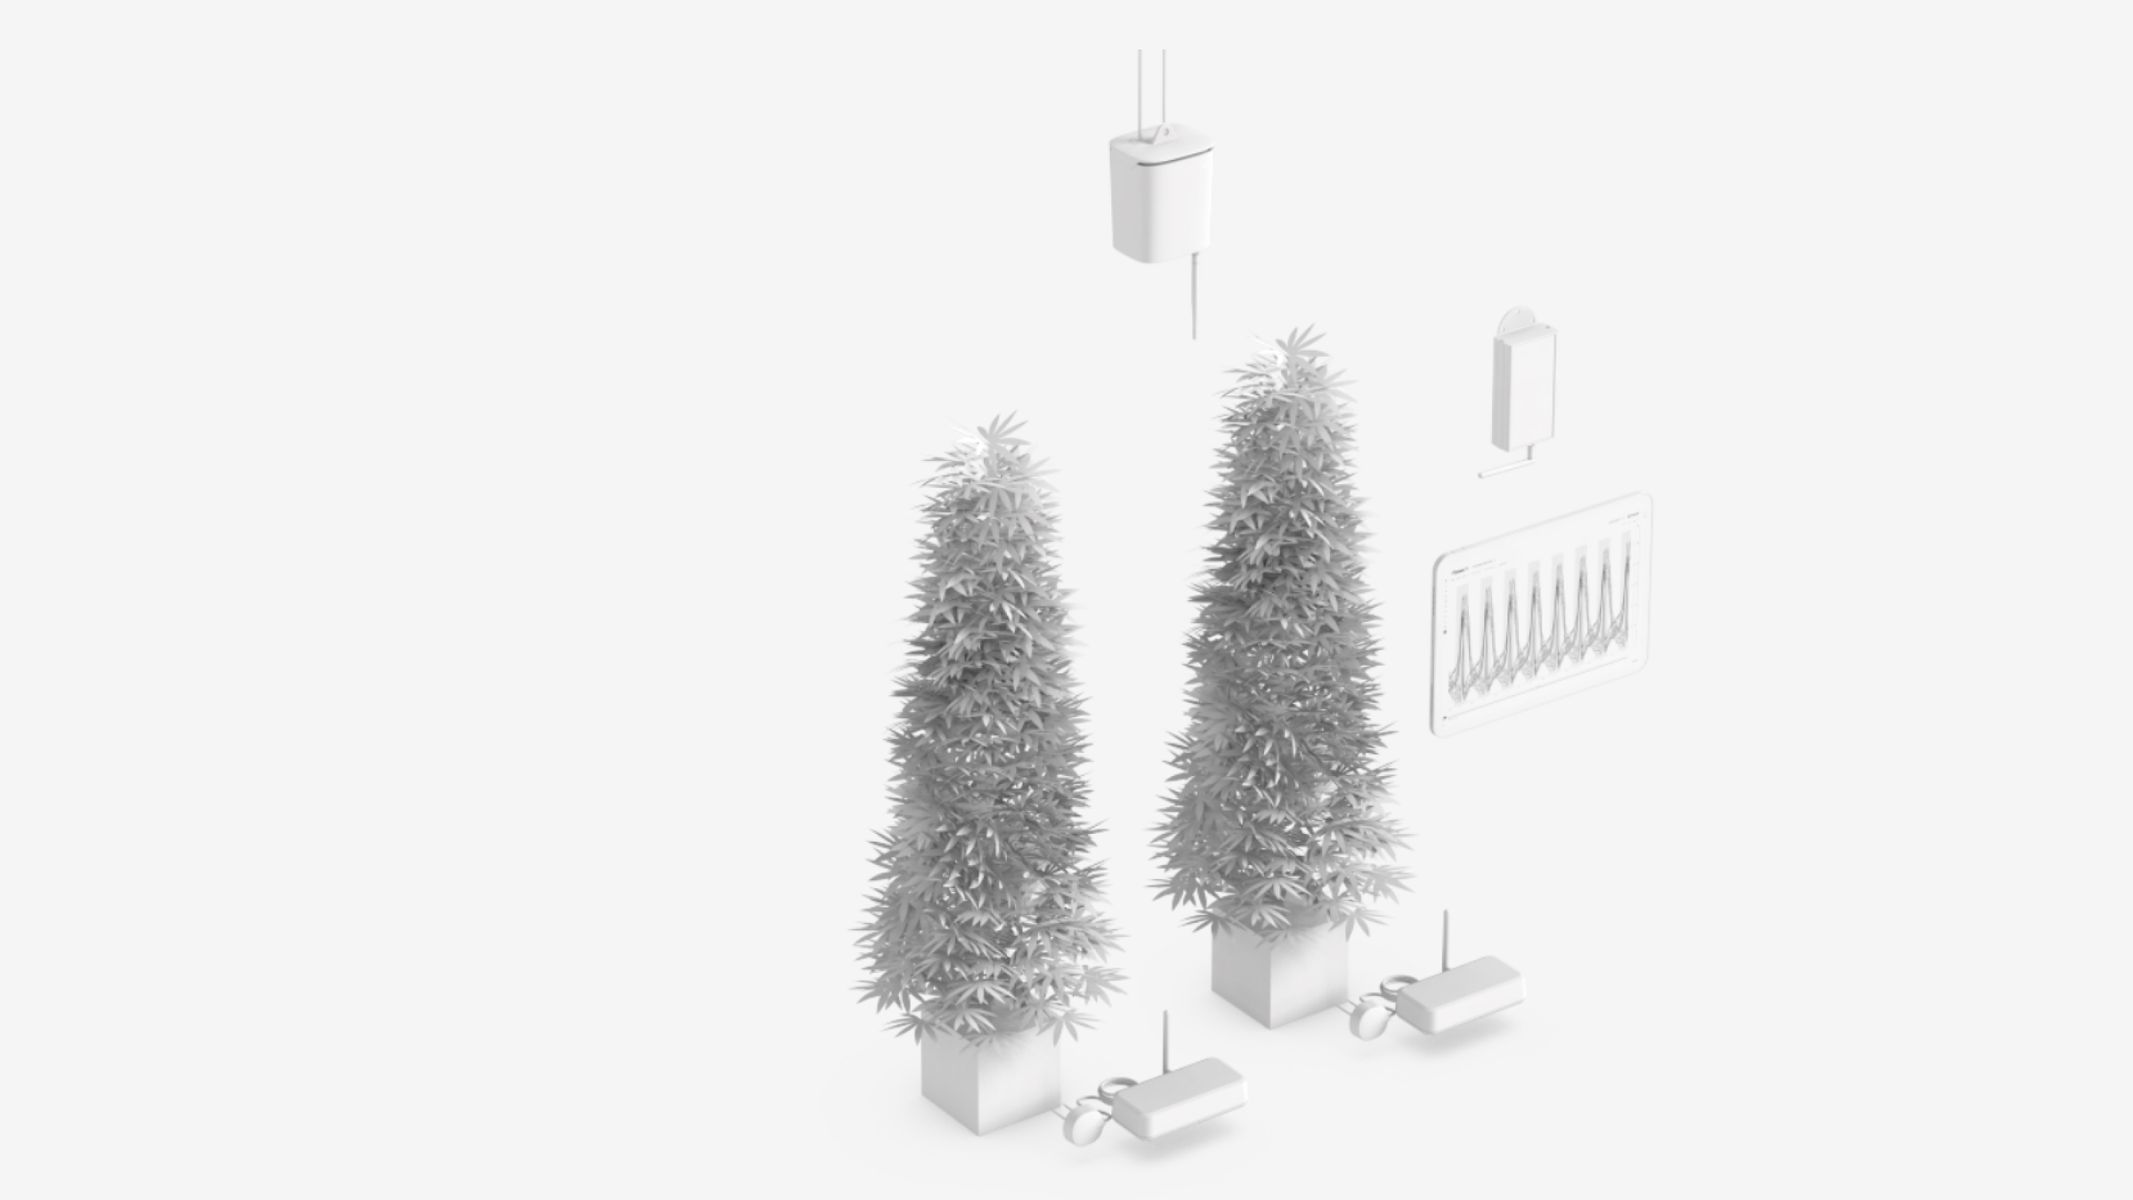
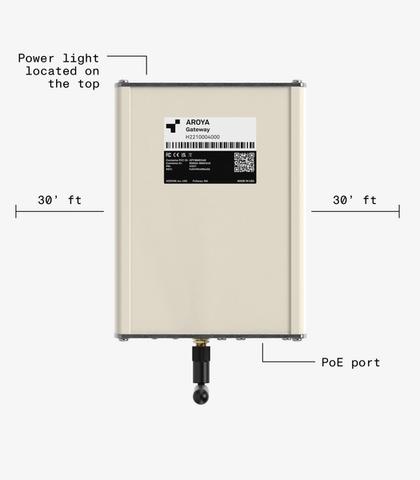
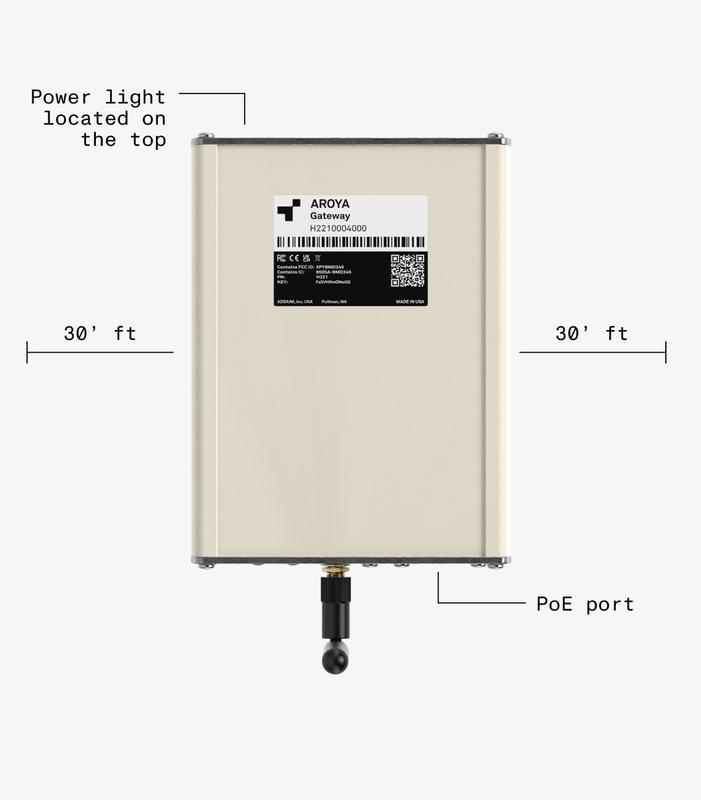
AROYA Gateway + PoE Power Injector w/ Ethernet Cabel. The AROYA gateway receives data from your sensors wirelessly through the AROYA mesh network. The gateway sends this data to the AROYA cloud platform every 3 minutes making it available for you to access from anywhere in the world. The gateway is powered via “Power over Ethernet” (PoE) and requires a wired internet connection accessible via the included ethernet cable.

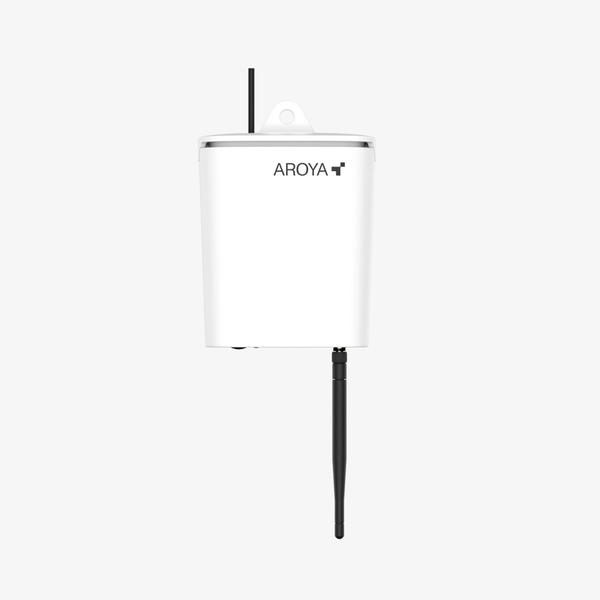
CLIMATE ONE Climate Station + PoE Power Injector w/ Ethernet Cable (power only) + Pulley & Hook
The CLIMATE ONE aspirated climate station measures relative humidity (RH), air temperature (tempair), vapor pressure deficit (VPD), and carbon dioxide (CO2) every 3 minutes. The climate station is powered via PoE and communicates effortlessly with the AROYA mesh network without any configuration needed. Just plug it into power and it’s ready to go!

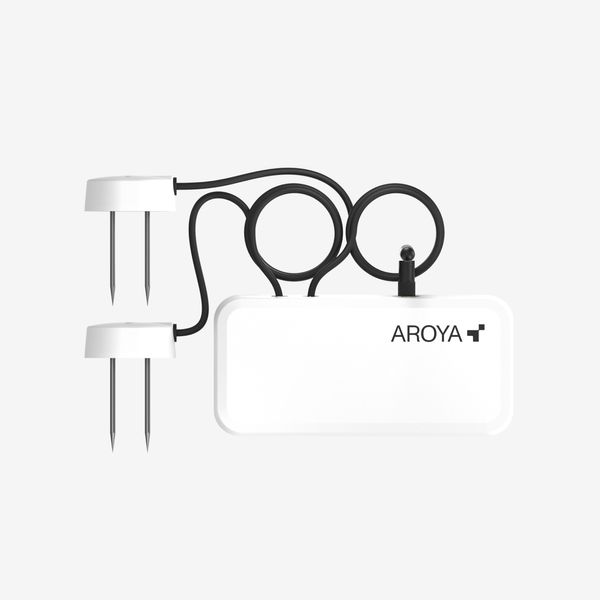
AROYA TEROS ONE Substrate Sensors
The TEROS ONE substrate sensor measures volumetric water content (VWC), electrical conductivity of the pore water (ECpw), and substrate temperature (tempsubstrate) every v3 minutes. The substrate sensor is ready to go right out of the box, powered by a 5+ year lithium battery, and automatically connects to the AROYA mesh network
– no configuration needed!
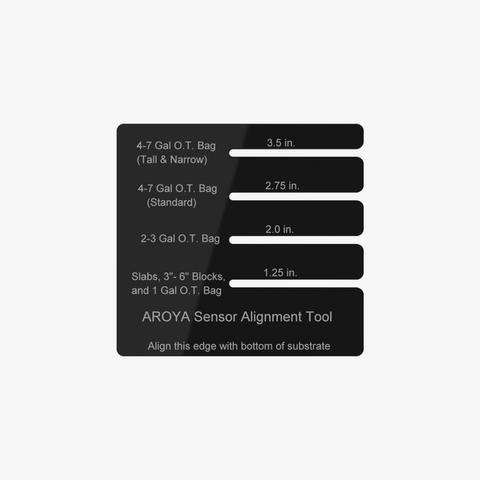
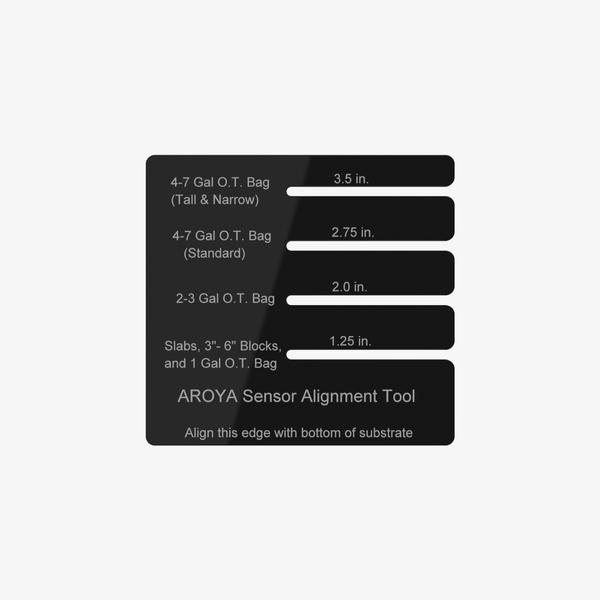
Sensor Alignment Tool
The sensor alignment tool offers guidance to ensure proper sensor installation and consistent readings in the substrate.
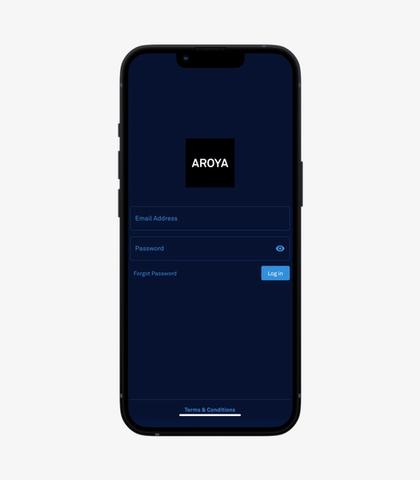
To access your account:

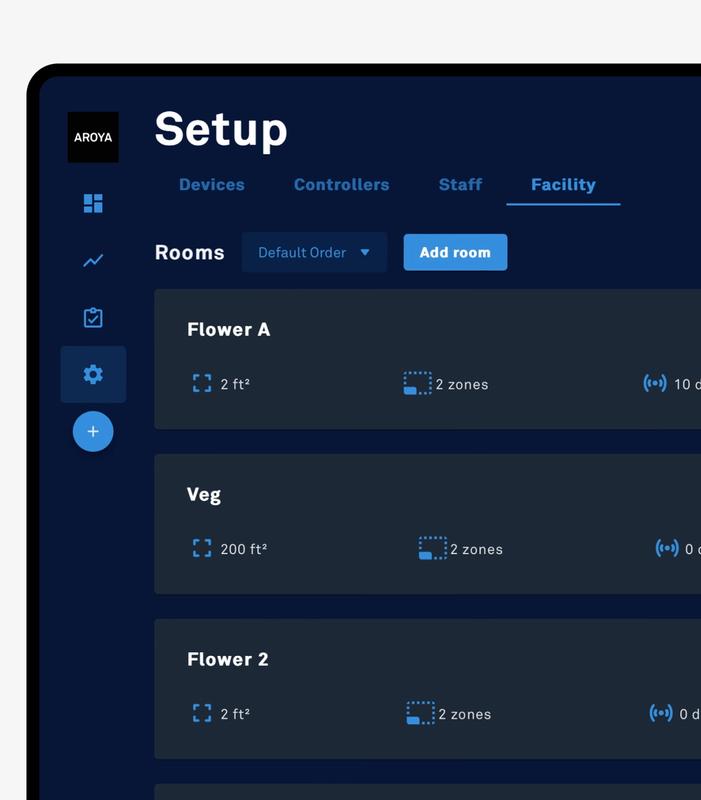
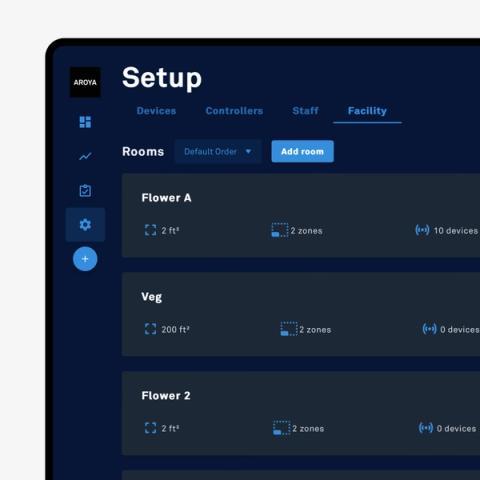
AROYA GO is set up with 1 room with 2 zones. In AROYA, a room symbolizes your grow tent or growing area, whereas a zone corresponds to your irrigation areas and/or benches. It's essential to assign sensors to rooms to begin recording data. Assigning sensors to zones enhances your ability to conduct detailed filtering when reviewing data on your room dashboard, accessible through the web or mobile app.
To add or rename rooms & zones:
Go to app.aroya.io.
Add or edit rooms there.

Place the gateway within 30 feet of your AROYA GO system for optimal connection. Adjust distance if needed.
Connect the gateway to your internet router or network switch using the ethernet cable. If those do not have PoE support, use the included PoE power injector to connect the gateway to the injector’s “OUT” port (may also be labeled “POE”, “POE Out”, or “Data & Power Out” depending on the model) then connect the injector’s “IN” port (may also be labeled “DATA IN”, “LAN”, or “LAN IN” depending on model) to the router.
The gateway will activate, showing a solid red light on the front for power, and connect to the internet shortly, showing a blinking yellow light next to the PoE port for data/link.
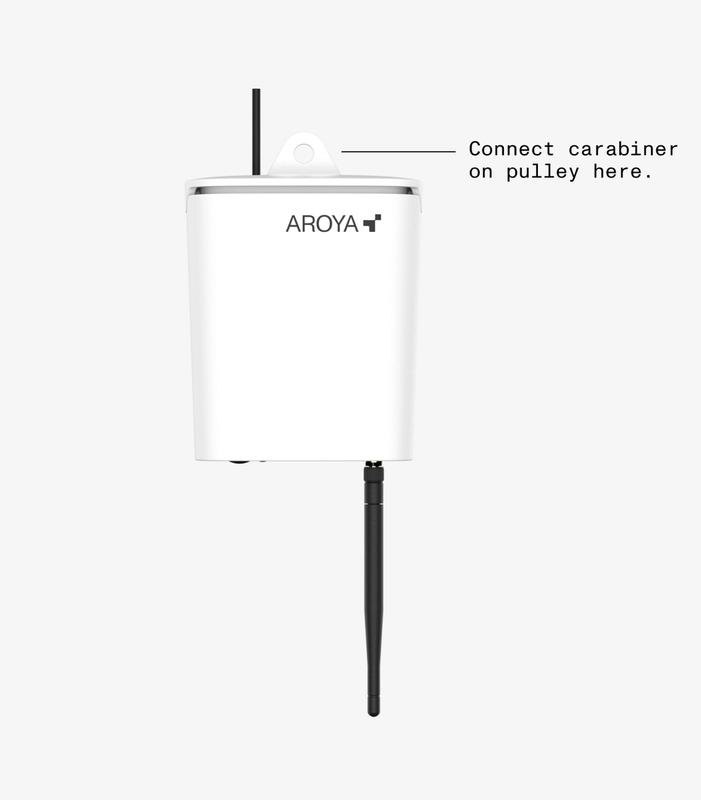
Use the included pulley and hook to hang the CLIMATE ONE in a central location above your plants. The carabiner on the pulley should connect to the eyelet on the top of the CLIMATE ONE, and the bare carabiner on the other end should be connected to the ceiling.
Plug the climate station into the PoE power injector “OUT” port (may also be labeled “POE”, then CLIMATE ONE will power up and automatically connect to your AROYA GO devices via the mesh network.

Install one TEROS ONE sensor in a single substrate using the included sensor alignment tool: position the bottom of the tool at the base of the substrate, and insert the sensor at the level that aligns with your substrate volume.
For the best data capture, it is advised to place one sensor in each irrigation zone, when applicable. Sensors are configured to communicate automatically with your AROYA devices via the mesh network.
AROYA GO captures and saves up to 60 days of cultivation data. To start recording data, assign your devices to a room via either the AROYA web app or mobile app.

WebApp:


Mobile app:
You are all set to embark on your crop steering journey. Data will begin streaming into your room dashboard shortly after assigning your sensors to their respective locations.
Receive the latest updates, guides, office hours, videos, and content for AROYA
Cookies are small text files placed on your device to store data so web servers can use it later. We and our third-party partners use cookies to remember your preferences and settings, show you personalized ads, and analyze how well our websites are working. For more info, see the Cookies and similar technologies section of the Privacy Statement.
